AWS HealthOmics에서 Annotation 작업 수행하기
AWS HealthOmics의 Analytics 기능을 활용하여 annotation작업을 수행할 수 있습니다.
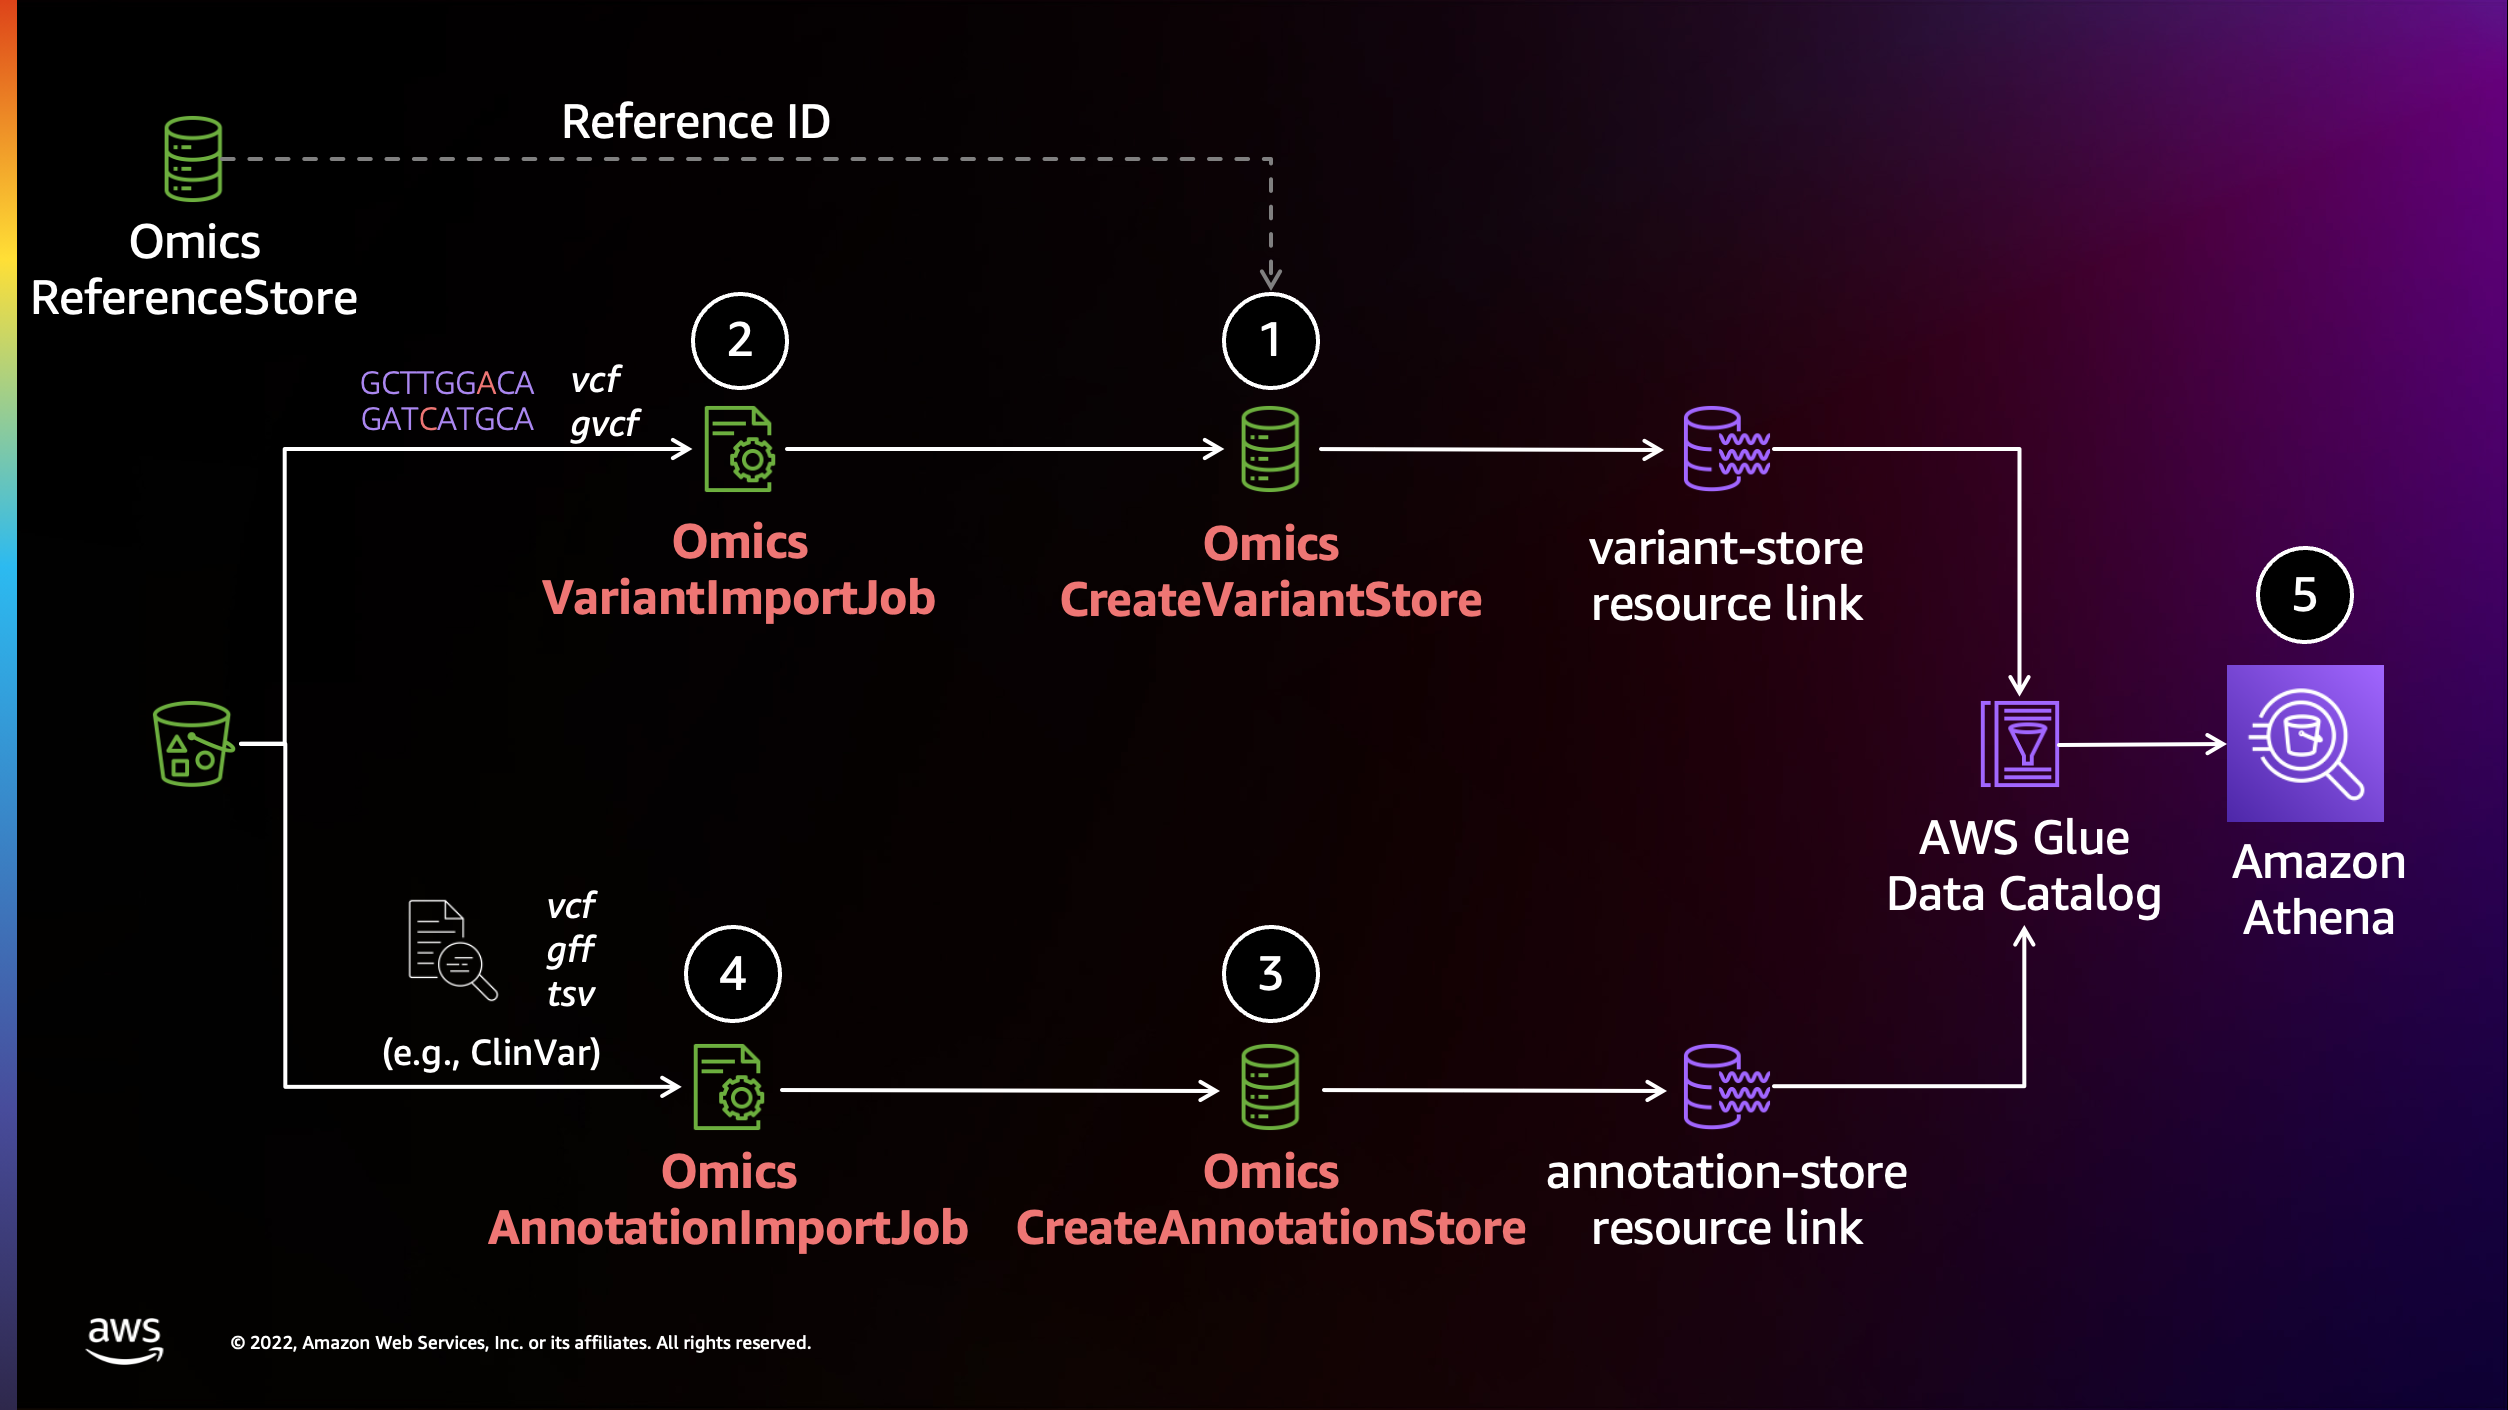
준비물
- 입력 샘플 VCF
- Annotation할 정보 소스 VCF (예: ClinVar)
s3://omics-eventbridge-solutio-healthomicsckaoutput6642-xbtuwqnxt8uw/outputs/9881593/out/output_vcf/NA12878.hg38.g.vcf.gz
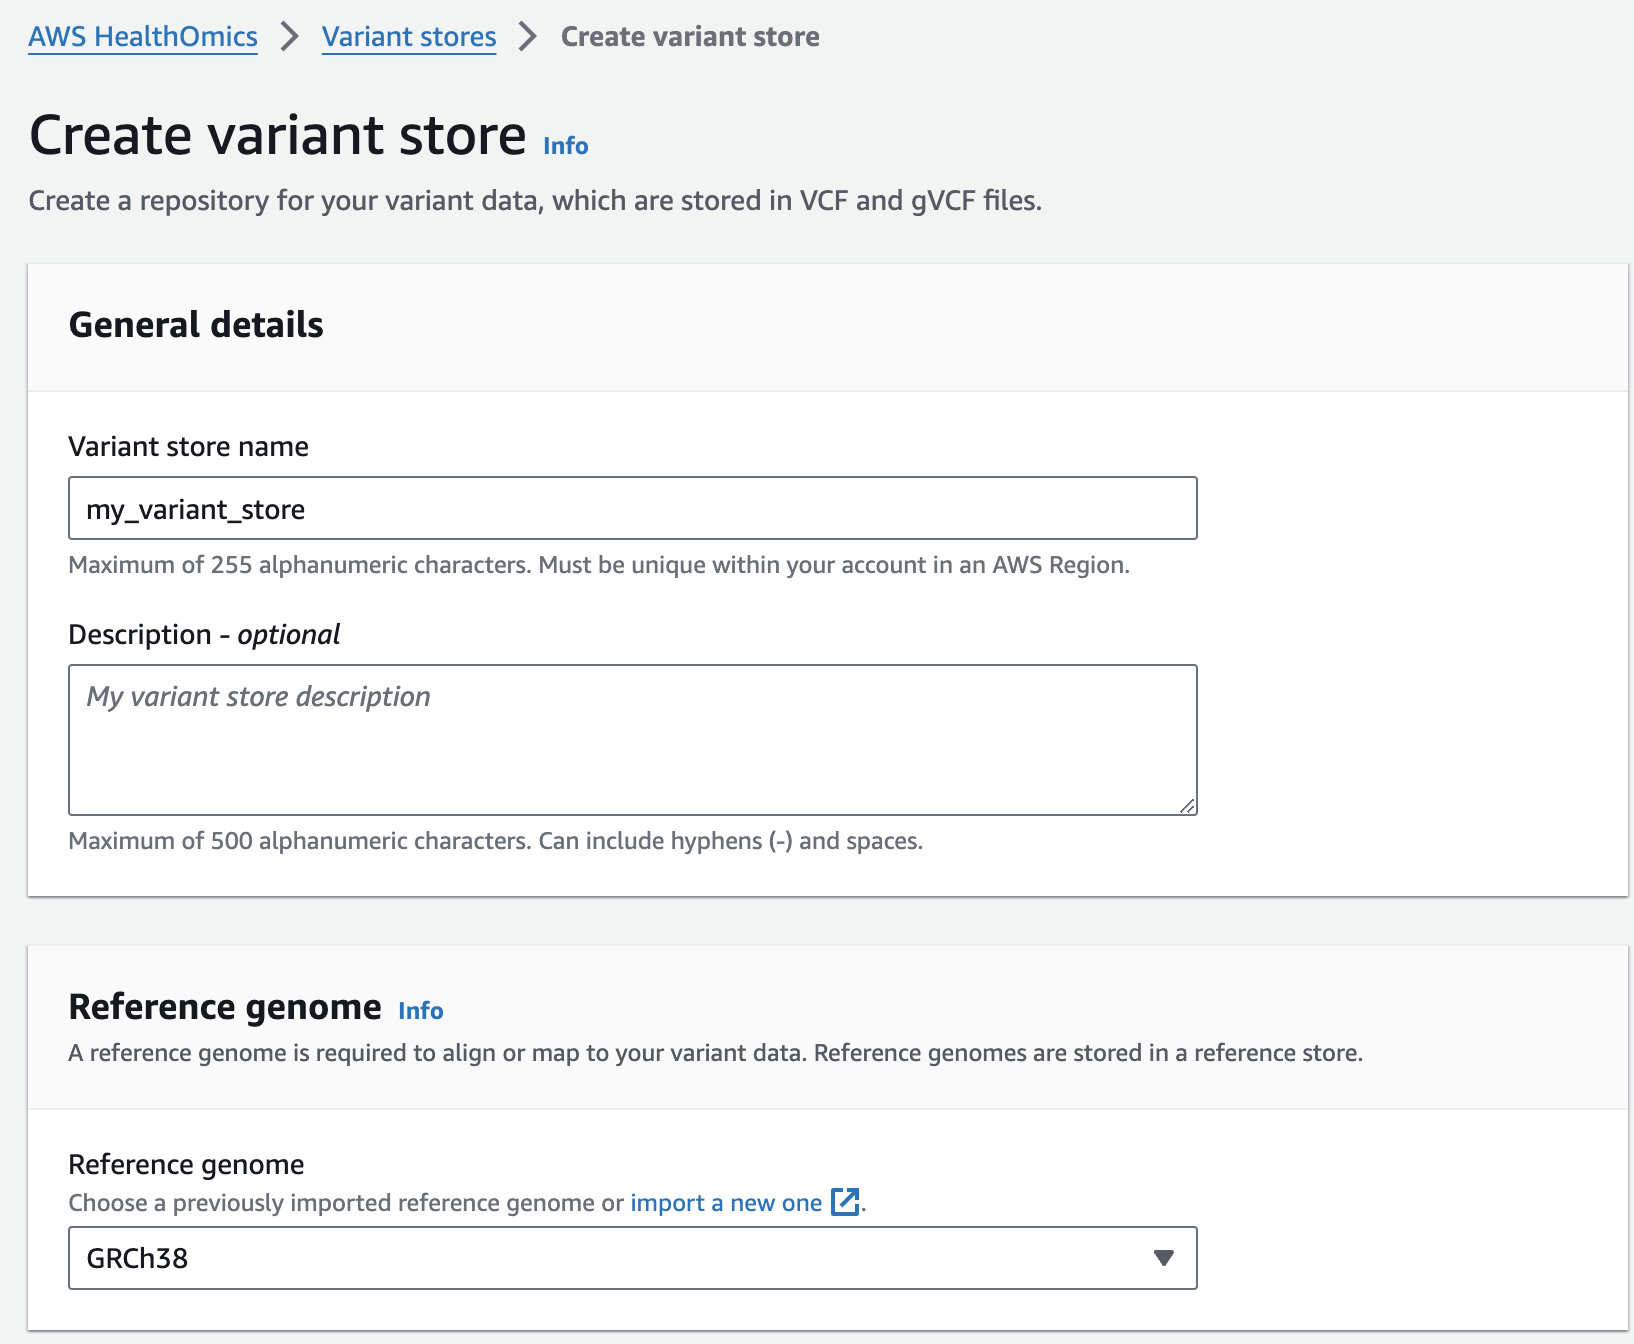
변이 스토어 생성
From the AWS HealthOmics Console, navigate to Analytics > Variant stores
Select Create variant store
For Variant store name provide "my_variant_store".
For Reference genome select "GRCh38" (this is a pre-provisioned reference, but you can alternatively select the reference you imported in the Reference Store part of the workshop)
Finish with Create variant store

변이스토어에 VCF 파일 가져오기
Next, you are going to start a VCF import job. To do this:
From the AWS HealthOmics Console, navigate to Analytics > Variant stores
Select the Name Variant store named omicsvariantstore1 (or the one you created above as appropriate)
Select Import variant data. If this option isn't available select Actions > Import.
Select Create and use a new service role
For Select variant data from S3 provide the following S3 URI:
아래 s3 경로는 입력 VCF 파일의 S3 URI을 의미합니다.
s3://omics-eventbridge-solutio-healthomicsckaoutput6642-xbtuwqnxt8uw/outputs/9881593/out/output_vcf/NA12878.hg38.g.vcf.gz

NOTE: The region will differ based on deployment region.
Start the import with Create import job
You should now see something like this:
- 적당한 Service role 이 없을 경우 새로 생성하여 사용하는 옵션을 선택할 수 있습니다.
- 앞에서 설명한대로 입력하고자하는 VCF 파일의 S3 경로를 작성합니다.
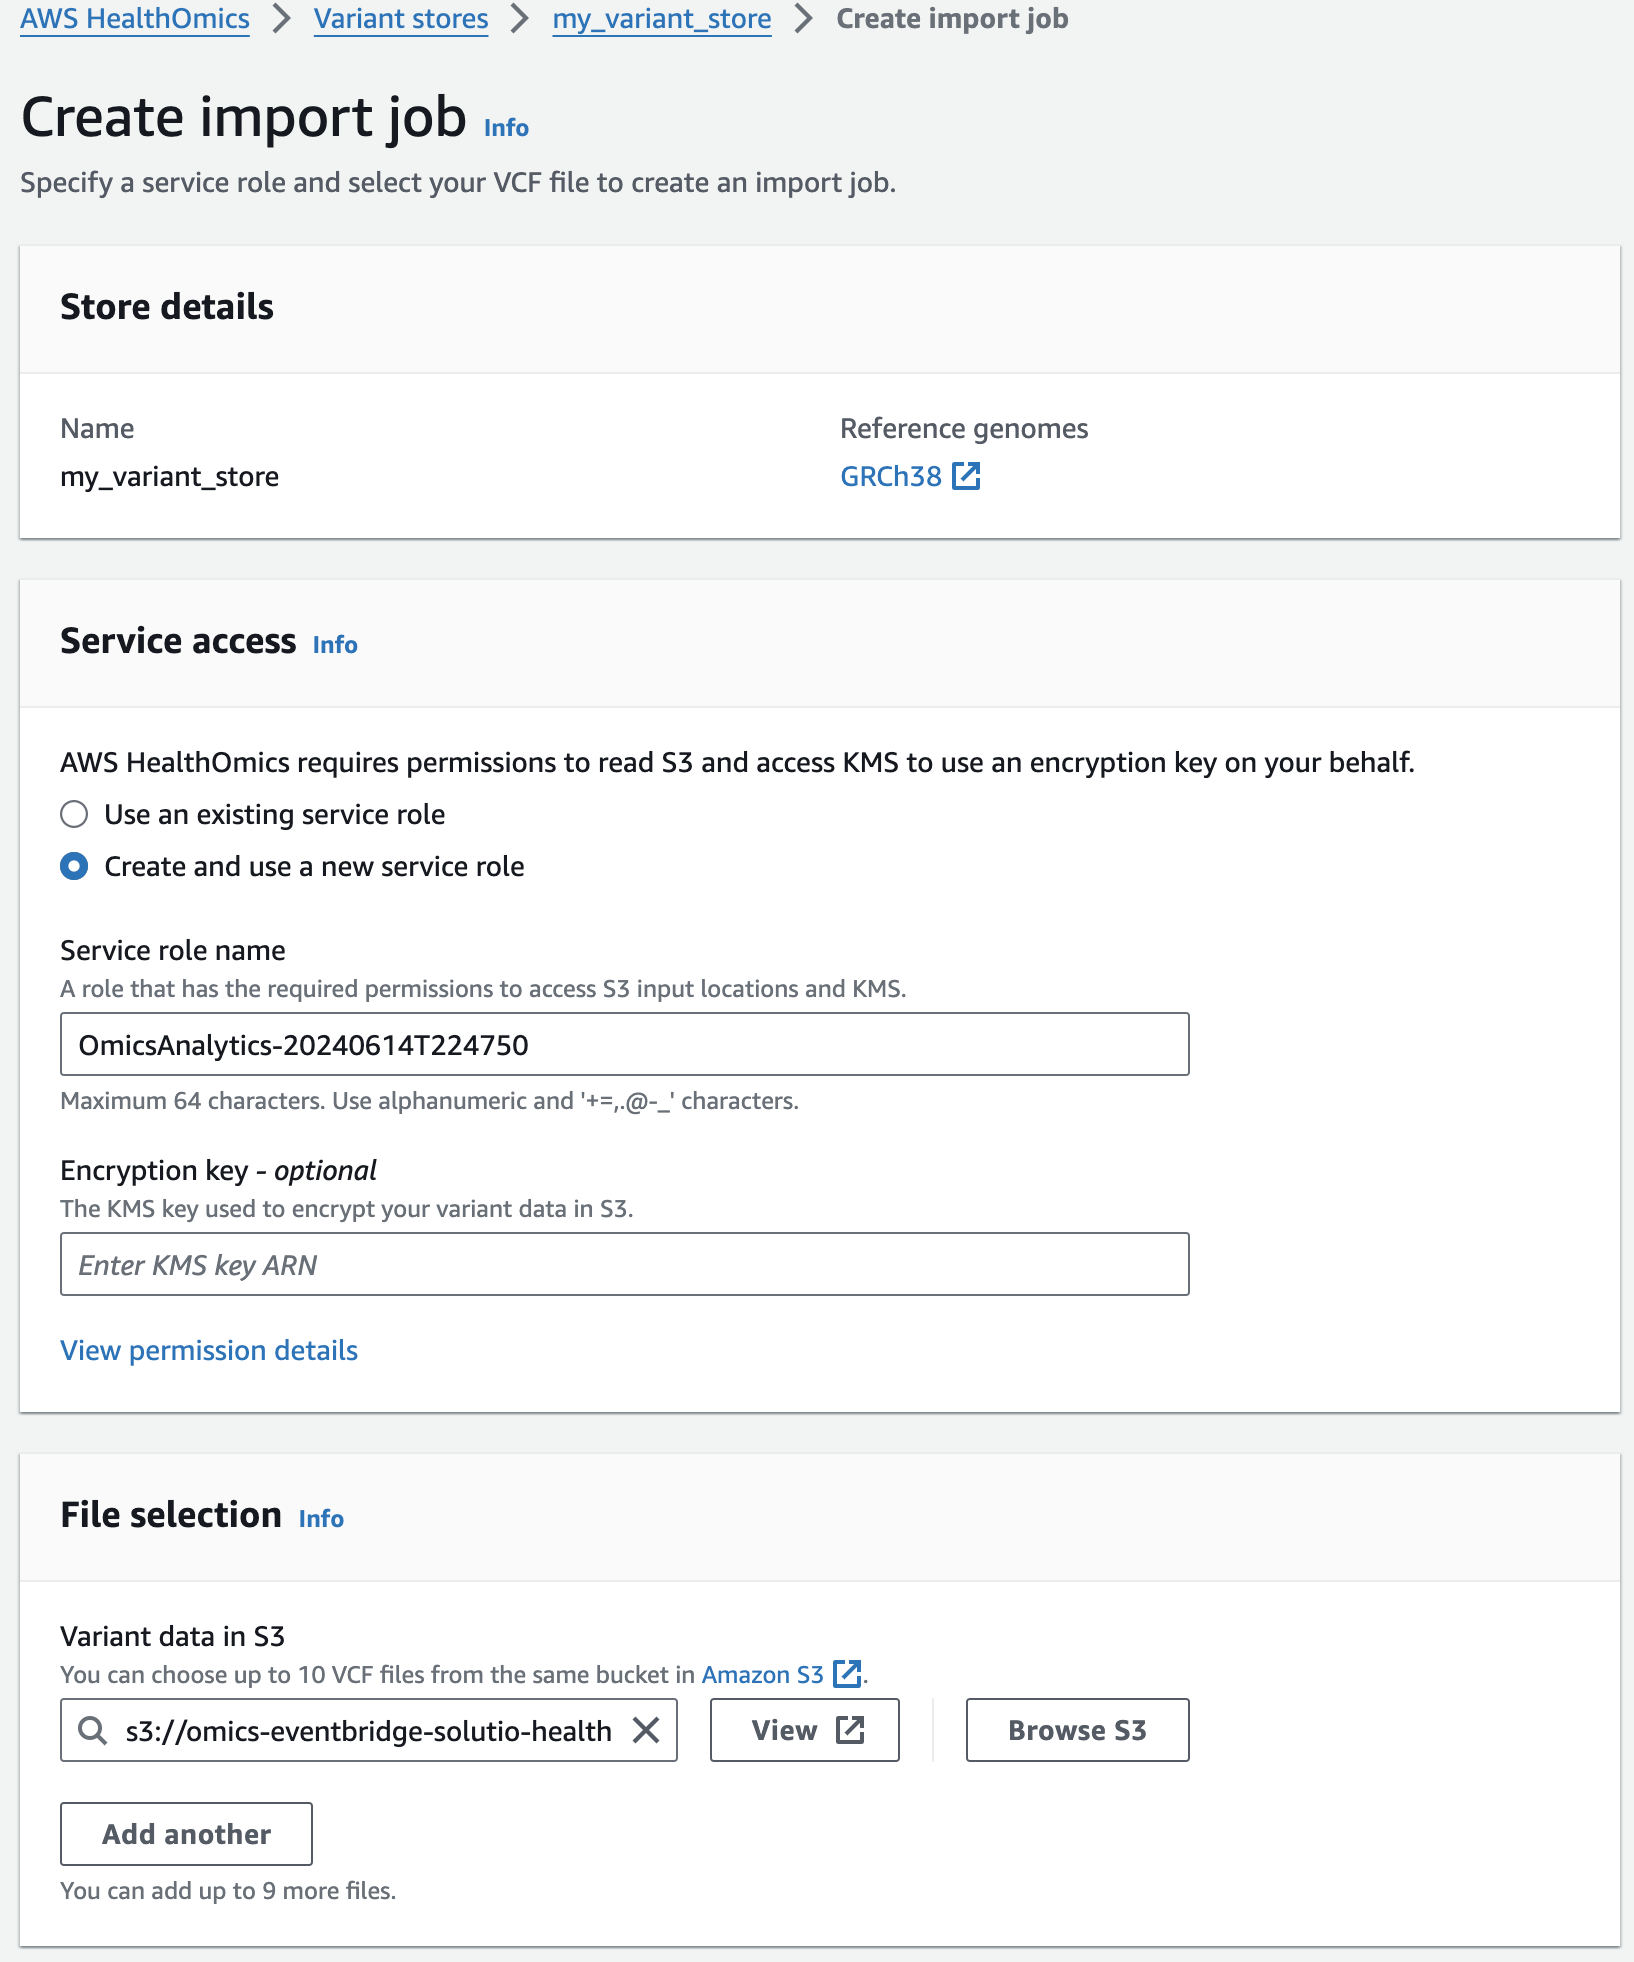
콘솔에서 VCF Import작업시 제출되었음을 확인할 수 있습니다.

기타 참고 리소스
- https://catalog.workshops.aws/amazon-omics-end-to-end/en-US/010-xp-console/300-omics-analytics
- https://github.com/vcflib/vcflib/tree/master
- https://github.com/Ensembl/ensembl-vep
- echtvar
- https://github.com/brentp/vcfanno